Instruction

A Great Shot by Udo Luetze

What makes a shot great.

What is the difference between an OK shot and a great shot?  There are certainly many different answers available and most of them are relevant but let me focus on only one:  The right moment in time.

P 51 and Corsair

The right moment

Think about it, facial muscles are constantly moving and expressions change from one split second to another.  We all know how hard it is to take a family portrait with everyone smiling and their eyes open.  It is even challenging when you take a portrait of a single person.  Sure you can snap a couple of pictures and one of them will be OK but to get a great shot, you have to work with your subject and your timing must be spot on.

The same is true for sports photography and action packed events.  You can take a thousand pictures but if you miss the peak of the action, you just get an OK picture.

Luckily technology is on our side.  DSLRs are capable of shooting an insane amount of pictures and our cards eat them all up.  Plus the higher megapixel cameras give us all the detail we want.  Sometimes it's spray and pray and other times, it's working a scene and taking pictures until you can hardly hold the camera.

I found myself in this situation during an air show in North Carolina.  I was shooting ground to air and you could not let go of the trigger and risk missing the peak of the action.

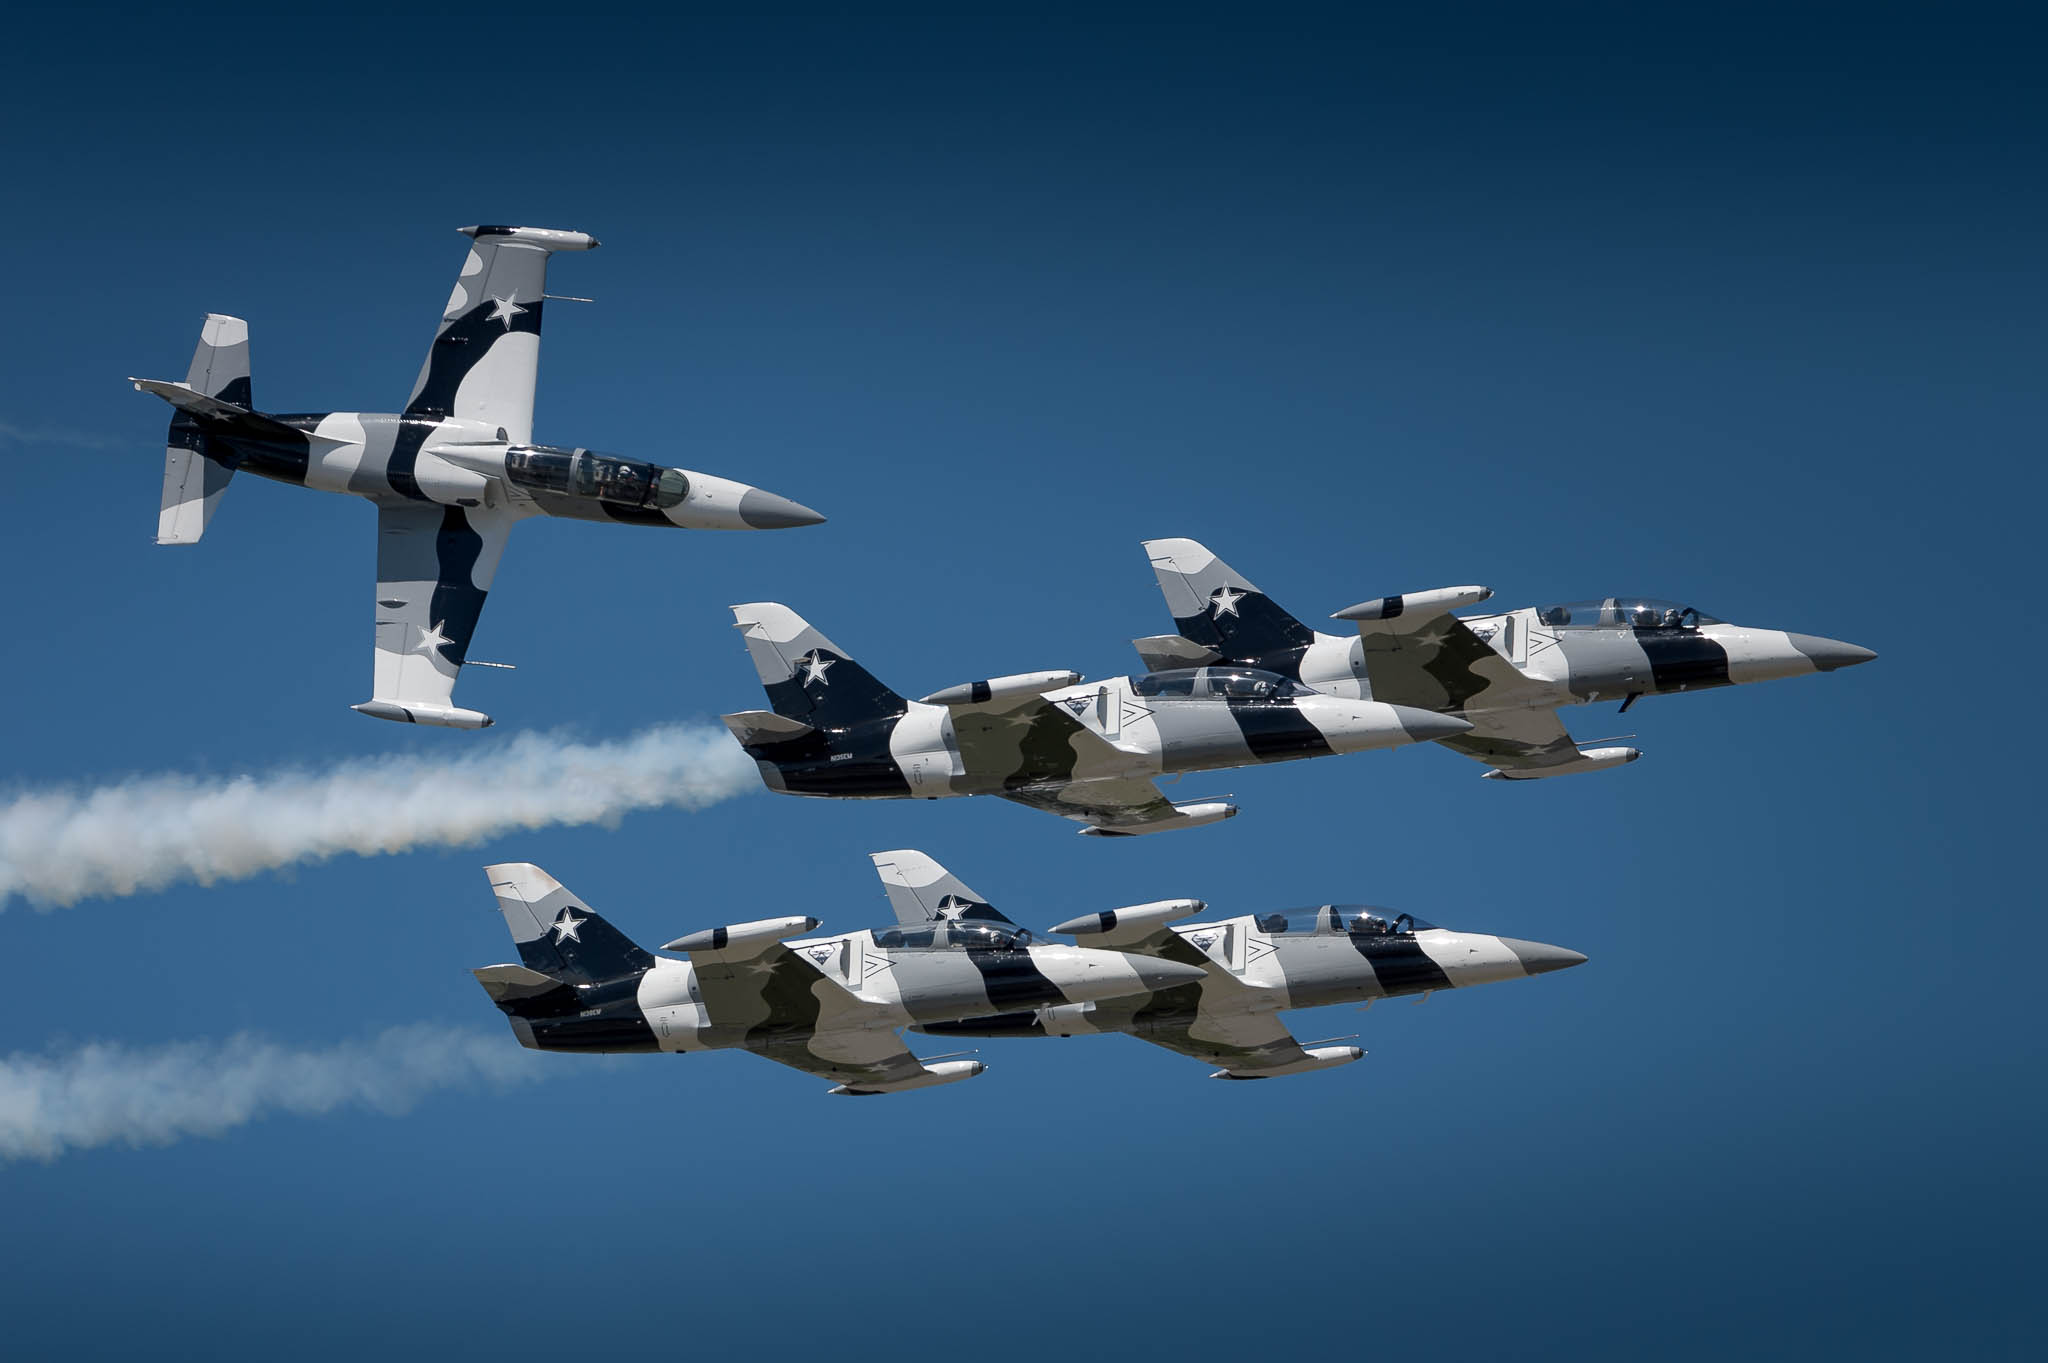
In this shot, the solo plane is performing a barrel roll around the diamond formation.  I wanted to catch the plane in the right position.

To capture this moment, I had to take about 50 shots on one pass alone.  Using two cameras, a D4s and a D810, creates thousands of pictures at an event like this.

Having powerful gear is great but it also has a downside.  You produce a ton of data and more pictures than you want to review when you are back at the studio.

I use Lightroom to find the keepers but when you have thousands of pictures, LR is too slow.  Waiting a second or two for a preview to build may not sound like much but trust me, it's a long time when you have to find the winning shot among 50 to 100 pictures.  Luckily there is technology to help you with this technological challenge.  Meet Photo Mechanic from camera bits at CameraBits.com.  The fastest software for reviewing images on the market (hey, if you find something faster, call me).

When I come home from shooting a sporting event or any other event with hundreds or thousands of pictures, I start my workflow with Photo Mechanic

Workflow with Photo Mechanic

The first thing you have to do when returning from the field is to copy your images from your camera to your computer.  Photo Mechanic shines at this.  The process is called ingest.  During ingest, you copy your pictures and create a contact sheet.  But this is not all.  You can also automatically update your metadata to include copyright and location information or any other metadata for this matter.  You can choose to make one copy at one destination or you can add a  second copy at a backup location.  When I travel, I typically cary my MacBook Air and 2 external hard drives.  After shooting, I ingest all my pictures and make a safety backup at the same time.  The result is a contact sheet that shows me all the pictures.

Now the fun really begins and this is where Photo Mechanic really shines.  I zoom in on the first image to fill the screen.  I used the left and right arrow keys to scroll through my images.  The previews build lighting fast and you can identify keepers which are sharp and in frame very quickly.  A picked image gets marked with a number or star just like you would do in LR.

Photo Mechanic is the fastest way to edit the images from my shoot.  This is something I can do on location while the ingest process is still taking place.  Once this is done, I identified my keepers and my trash.  I then import my keepers into LR at my studio where I manage and archive all my pictures.  The "trash" files go to my server where I maintain a special folder for unwanted images.  I keep them there for about 3 months before I delete them for good.

Getting the right shot is all about pointing the camera in the right direction at the right time.  It is also important to be able to find your keepers fast amongst the thousands of pictures you take.

The difference between a good and a bad photographer is simple.  A good photographers only shows his best images.  

Hope you enjoyed this post.  Please follow me on social media and contact me with any questions or comments. 

Panorama Workflow by Udo Luetze

For a long time, I wanted to document my panorama workflow from start to finish.

Equipment

  • Nikon D810 with 8mm Sigma fisheye lens set at f16
  • Nodal Ninja Ultimate R1 panoramic head with Sigma 8mm fisheye adapter
  • Really Right Stuff tripod and ball head
  • Adobe Lightroom cc 2015, LR
  • Adobe Photoshop cc 2015, PS
  • PTGui PRO, PTGui

click to enlarge

In this example, I am taking a spherical panorama of New York City from Governors Island.  My camera is pointed upward at 7.5 degrees and I am taking pictures from 6 positions at 60 degrees intervals.  Since I am using a true circular fisheye with 180 degrees view in all directions, it doesn't matter weather I use my camera in landscape or portrait mode.  I prefer portrait mode because it is easier to operate the camera this way.

From where to shoot

Needless to say that you should have a clear view of you main subject, but please don't ignore the surroundings around you, including the ground below and sky above you.  In this situation, I picked a spot along the water front in the shade under a tree.  It was early in the day so I did not have to worry about people in my picture.  The shade under the tree also offers two more advantages:
ONE: Shade on the Ground eliminates shadows of camera equipment which have to be removed in post.
TWO: The sun is shining through the canopy and at f16, the lens creates a nice starburst effect.

Setup

A solid and sturdy tripod is a must.  The panorama head should be perfectly level to avoid additional work in post processing.  I use my iPhone to get the pano gear level.  Since I am using a light travel tripod, I hang my gear bag from the center column to further stabilize the setup.  One more thing.  As you can see in the picture, the neck strap is still attached to the camera.  I hold it in my left hand while I am shooting as a safety measure in case the setup is not entirely sturdy.  Just make sure that the strap stays away from the lens. 

Shooting

Before you can shoot, you need to get a meter reading for proper exposure.  I use my camera with the fisheye lens and take some test shots of the main subject to establish proper exposure.  You also need to set you focus to a point where everything is in focus at f16.  Consult a chart or an app for the right focus distance.  Then lock focus so that the camera does not refocus during the shoot.  Once proper exposure is established, I dial it in and switch to manual mode.  I took 5 pictures (HDR) at 1 f-stop interval at each position, resulting in 30 pictures for this panorama.  The Number of HDR intervals depends on the lighting situation and the dynamic range of your cameras sensor.  To get the maximum performance, I shoot in RAW.

click to enlarge

You should shoot as fast as possible.  Moving clouds can change the lighting situation to a point where the images from the first and the last set don't fit exposure wise.  You can also shoot 2 or 3 sets of images so that you have options.  I do this when I have people or cars moving through my image.  If they disturb my picture on the first go around, maybe they are gone on the second.

It is recommended to use a cable release to reduce camera shake.  I used a different method.  I set my camera (Nikon D810) to bracket 5 exposures at 1 f-stop interval.  Then I set my timer to 2 seconds.  At each position, I pressed the shutter button and 2 seconds later, the camera took 5 pictures for me automatically.  The 2 second delay was enough to reduce camera shake. 

That's it.  Check your work for exposure, sharpness, content and completeness.  Once you are satisfied, you can pack up and head to the studio for post processing.

Post Processing

All pictures are imported into LR.  I remove Chromatic Aberration from all images and that's it for processing at this stage.  Whenever I do HDR, I like to process the image as little as possible so that the software has the original information to work with.

HDR is being processed inside of LR.  For this I select the first and the last picture in the series only!  This works extremely well with the D810.  I select Auto Align and Auto Tone.  The deghost amount is set to high due to the water and the leaves.

click to enlarge

Now I select the HDR images and check them for exposure differences on an individual basis.  Be careful no to touch any other settings since they vary due to Auto Tone.  Finally, I do a global adjust on sharpness and noise reduction before I export those files into TIFF format.  I take this step to "bake" the auto tone values into the image.

Next I reimport the TIFFs into LR for final editing.  You can see my values for editing in the screen shots below.

After import, click to enlarge

After edit, click to enlarge

I also check again for chromatic aberration.  Now I am ready to export the files once again as TIFFs for stitching in PTGui.  Inside PTGui I make sure that the pictures align properly and that I don't have any problems to deal with later on.

Pictures are ready for alignment in PTGui. Click to enlarge

Aligned panorama, ready for stitching. Click to enlarge

Prior to stitching, I run the optimizer to check the quality of the alignment. 

click to enlarge

Alignement is good so we are ready to create the panorama.  I save it as a TIFF file set to optimum size.  Here is the finished file from PTGui.

click to enlarge

Now we have to deal with the bottom of the picture.  My pano setup does not cover the area of the tripod at the bottom, thus there is a blank space in the pano.  You can take a shot of the ground once the tripod has been removed and mount this picture into the image.  In this case, I am placing the famous chrome ball at the bottom of my image.  For this I open the image in PS.

First I set a new horizontal guide where the chrome ball should start.  This is right above the tripod legs visible in the picture.

click to enlarge

Next I select the image above the horizontal guide and copy it onto a new layer.  Then I flip this new layer vertically.

click to enlarge

Finally I compress this new layer to the height of the space below the horizontal control line and place it there.  This layer should be perfectly centered underneath the original picture.

click to enlarge

That's it.  Now you can save the image and display it.  Here is the final image:

click to enlarge

Finally I used KR Pano to convert the finished file for web viewing.  Click on the image below for the finished result.

click to see the final pano in a web browser

click to see the final pano in a web browser

Thanks for reading this blog entry.  Please contact me if you have any questions or comments about this post.

Click HERE to see all of my panoramas.

Udo Luetze